Dessert Beer: Humble Pie

No, I’m not really making a dessert beer NEIPA.  However, making a NEIPA that can stand-up to some of the great examples in and around town has been quite the challenge. My last brew was another round of corrections to address the overly-bitter result. Not Grapefruit Juice was a step in the right direction but it had several issues.

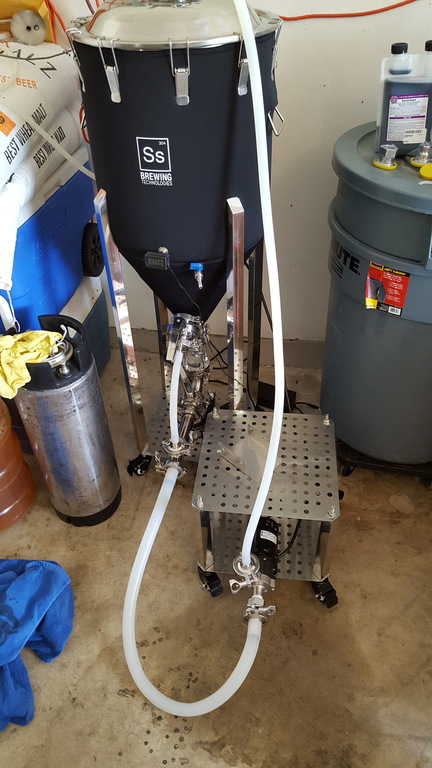
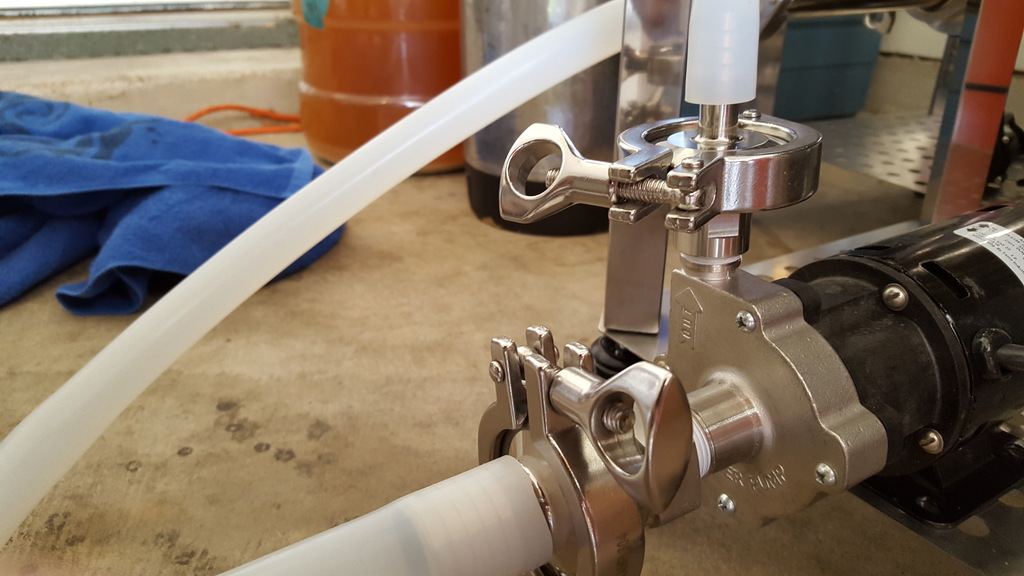
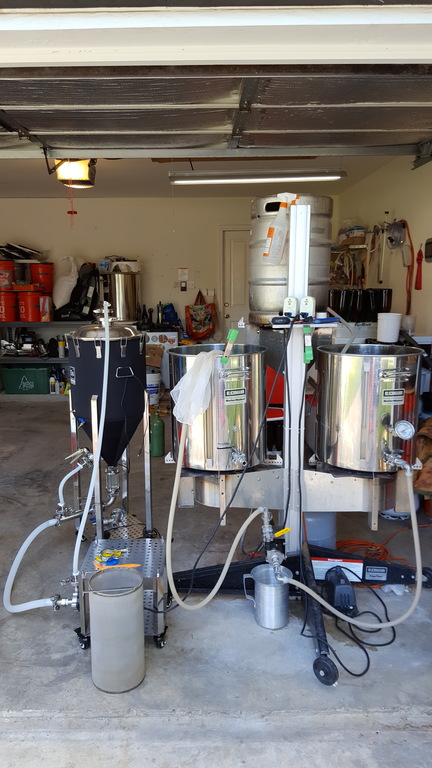
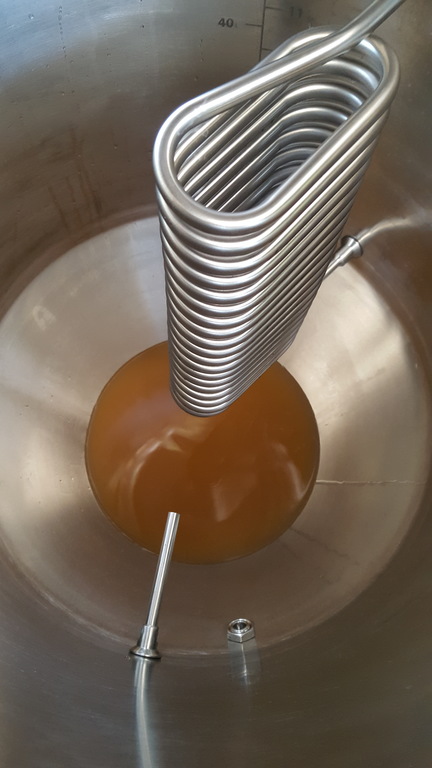
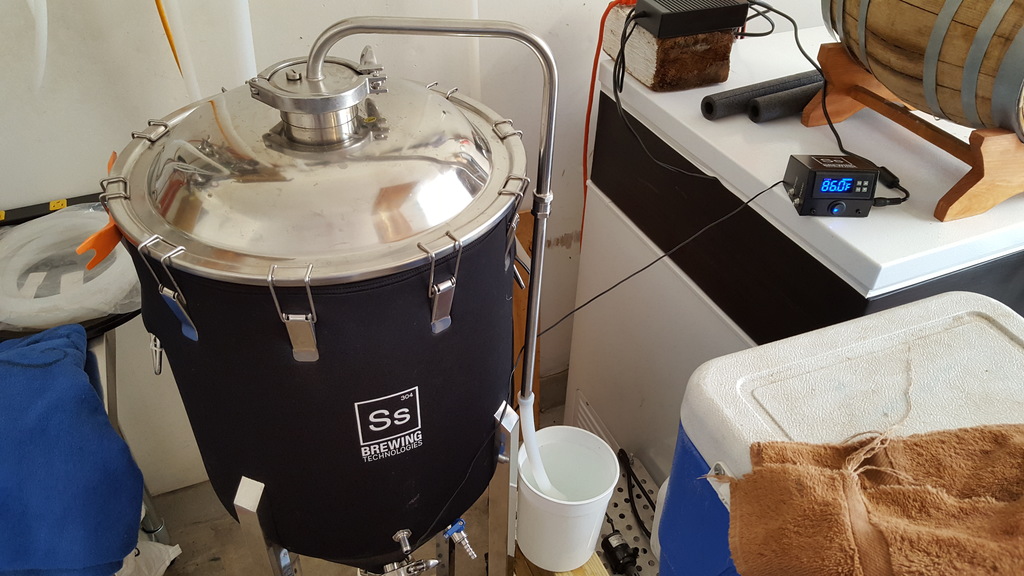
Before I get to that, I do have to mention that the past few NEIPAs that I’ve done have ended up getting a rather nasty diacetyl flavor days after kegging. I’m particularly sensitive to the off-flavor and really prevented me from drinking any amount of the beer.  I’ve several friends for whom the level was not something they could detect and they still enjoyed the beer and commented that it was an improvement over the previous version.  Tracking down this problem was quite the challenge.  I first attacked the keg and keg lines.  I didn’t find anything of concern and each keg is fully broken down, cycled with hot PWB via Mark’s Keg/Carboy washer, sanitized and flushed.  The keg lines use a recirculating PWB line cleaner followed by hot water rinse and sanitizer.  I really was stumped until I ran across this post out on Brülosophy where a long time friend of the site was tracking down a similar issue and worked out some experiments to track down the issue.  The discovery was that the ball-valves on the boil kettle weren’t getting direct heat due to the burner design.  This matched my setup, but I had recently switched to a new 30 gallon boil kettle with only a hand full of brews under its belt.  However I have two ball valves on the March pump used for recirculation.   I started the process of breaking those down and let’s just say it was *NOT* pretty.  I also broke open the pump itself and found bits of sponge.  I was quite furious with myself.  After switching to a new Chronical which requires a complete break down after each use I just couldn’t believe that I hadn’t applied that same effort to the post-boil path.

I don’t think the diacetyl flaw impacts the bitterness issue so I knew that after tasting Not Grapefruit Juice that something else was going on with the bitterness.  While I was scrubbing away at all of the post-boil parts I did quite a bit more reading on the recent studies around flameout and dry-hop additions imparting bitterness.  Reading through all of those blog posts and papers left me a distinct impression.  Massive dry-hops definitely have a bitterness impact in two ways.  First, additional dry-hopping can result in lower pH which increases perception of bitterness.  Second the non-iso-alpha acid components of hops can contribute actual IBUs to a finished beer.  A deeper look into those studies reveals that hops which do not store as well (these hops have a higher HSI value) result in more IBUs being imparted into the final product when used in dry-hopping.  With this new information in mind, I’ve put together three new NEIPA recipes to try out.  Taking in all of the change from Not Grapefruit Juice, the biggest change moving forward is a much reduced amount of dry-hop;  the rate of dry-hop previously resulted in bumping the final product by several tens of IBUs.  I’ve also continued to adjust the malt bill upwards, this time blending with Vienna and targetting 7.5% and a higher overall final gravity; this was featured in the very first recipe I tried.  The next two variants keep the same quantities of hops and gravity bill but will try two different things.  One will re-introduce cryohops but at a 60/40 split between pellet and cryo, accounting for the higher AA in cryohops.  Joe Mohrfeld at Pinthouse Pizza presented early results when using cryohops/powder and found that they get the best results with a blend of pellets and powder.  The last experiment looks to identify hops with fruity, tropical properties but have the lowest HSI value.  The expectation there is that these hops will further reduce the introduction of IBUs into the final product.

Lastly as a side-note I have been mostly avoiding use of Simcoe for quite some time.  Beers from five or six years ago had massive amounts of Simcoe and had a nice piney almost “cat pee” element.  These memories of flavors do not excite me and I’ve felt they don’t have a place in the softer, juicier IPAs I really like.  I’ve had several recent NEIPA beers which feature Simcoe as a hop that drives perception of Oranges and Tangerines and have not found these beers to have any of those piney or cat like qualities of the past.  I’m looking forward to giving Simcoe a place in a future NEIPA once I’m on the other side of this battle with bitterness.

Here’s the next experiment towards that pillowy soft and juicy beer I crave:

Recipe Details

Batch Size Boil Time IBU SRM Est. OG Est. FG ABV
15 gal 60 min 63.7 IBUs 5.7 SRM 1.068 1.016 6.9 %
Actuals 1.068 1.016 6.9 %

Style Details

Name Cat. OG Range FG Range IBU SRM Carb ABV
American-Style India Pale Ale 56 1.06 - 1.075 1.012 - 1.018 50 - 70 6 - 15 2.2 - 2.8 6.3 - 7.6 %

Fermentables

Name Amount %
Brewer's Malt, 2-Row, Premium (Great Western) 14 lbs 36.84
Vienna Malt (Weyermann) 14 lbs 36.84
Oats, Flaked 4 lbs 10.53
White Wheat Malt 4 lbs 10.53
Carapils (Briess) 1 lbs 2.63
Honey Malt 1 lbs 2.63

Hops

Name Amount Time Use Form Alpha %
Columbus (Tomahawk) 1.5 oz 60 min First Wort Pellet 15.3
Amarillo 2.5 oz 10 min Aroma Pellet 9.2
Citra 2.5 oz 10 min Aroma Pellet 14.4
Mosaic 2.5 oz 10 min Aroma Pellet 11.6
Columbus (Tomahawk) 1.5 oz 10 min Aroma Pellet 15.3
Amarillo 2.67 oz 3 days Dry Hop Pellet 9.2
Citra 2.67 oz 3 days Dry Hop Pellet 14.4
Mosaic 2.67 oz 3 days Dry Hop Pellet 11.6
Columbus (Tomahawk) 1.5 oz 3 days Dry Hop Pellet 15.3

Miscs

Name Amount Time Use Type
Calcium Chloride 7.30 g 60 min Mash Water Agent
Epsom Salt (MgSO4) 2.70 g 60 min Mash Water Agent
Gypsum (Calcium Sulfate) 2.40 g 60 min Mash Water Agent
Phosphoric Acid 1.20 ml 60 min Mash Water Agent

Yeast

Name Lab Attenuation Temperature
San Diego Super Yeast (WLP090) White Labs 80% 65°F - 68°F

Mash

Step Temperature Time
Saccharification 156°F 60 min
Mash Out 168°F 10 min

Notes

Adjust cl:s04 to 1.5 ratio
Use columbus
Single dry-hop
1:1 GU:IBU ratio
Swap in 50% base with Vienna for additional malt backbone
Welcome Amarillo to the Hop Club
Gravity bump to 1.071

Testing out the Chronical

it's unwrapped!

SS Brewtech 1/2 BBL Brew Master Edition Conical, leg extensions, wheels and blow-off cane.

After many years of promising myself and others that I’d get a conical I finally did.  It took a while.  I really had wanted a Blichmann; mostly because they had just about everything right from the start and most of the other options we’re either much more expensive (hard to believe right?) or just not as well made.  My close friend picked up a smaller 7G Stout tank and ended up upgrading the connections as well as fiddling with the lid for a tight seal and the 3-leg design was rather tippy but ultimately didn’t use it that often since it lacked a good mechanism for chilling.  Blichmann of course doesn’t either but were constructed to fit upright freezers or fridges.  My search continued.

My initial look at SS Brewtech bucket as well as conical left me not convinced.  The primary use-case for the conical was to have a vessel from which I could complete fermentation, yeast dump, dry-hop, recirculate and ultimately bottle or keg the beer without exposure to O2.  Initial buckets and conicals came with warnings that pressurizing was not supported.  The cooling system of coils was an add-on and it lacked a simple way to clean the conical in-place.  The most recent so-called “Brew Master Edition” however was aimed at addressing all of those points.  I found myself convinced after viewing a couple of threads on Homebrew Talk where some users had started to put together a complete solution.  In June I finally ordered the half-barrel and all of the parts needed for a CIP cart.

Clean Me!

Conical with Clean In Place (CIP) cart. This pumps PBW (or Acid cleaner) into the top which has a spray-ball. It outputs liquid through both the racking port and the bottom dump. 1″ host at the bottom back into the the pump.

Shiny!

I swapped out the pump face for a Chugger Stainless Steel Center-inlet on my March 815 HS pump.

After some time with the conical learning the tri-clover connections, figuring out the CIP process as well as how I was going to transfer beer from the boil-kettle to the conical, I was ready for a brew session.

I decided that my best course of action was to brew something that I wouldn’t mind having a lot of (15 Gallons is a lot for one brewer to drink) but light enough in cost that if this failed I wouldn’t be tempted to ignore the flaws that a new process and equipment might introduce.  I also had a nice 500mL slurry of yeast from the previous 5 gallon batch which was a ready-made pitch for a 16 Gallon batch!

woxford-morning-brew-is-hot-so-double-fan-1024x768

Due to various time constraints, I unfortunately had to brew during the day.  Texas is not enjoying the previous two weeks of mostly 100+ F days.  Today was no exception, high of 100F; though a 40% chance lies, err of rain?  Woxford, however is equipped for summer brewing and two fans were strategically placed near the brewers station.

Don't try to brew and fight off wasps...

On brewday I ran a batch of Saniclean (non-foaming sanitizer) through while I was draining wort from the mash tun to the boil kettle.

After a 60 minute mash and waiting for the HLT to bring nearly 15G of sparge water to temperature I transferred from the mash tun to the boil-kettle.  While that was running I ran 1 oz of Saniclean (no rinse sanitizer that foams *much* less than Star San) through the conical with the CIP Spray-ball and the tubing connected.  That only requires 3 minutes of contact time but it ran for about 20 minutes.

I wish I could do 5 gallon batches in this thing but the coil is too high up.

Inside of the conical during transfer. The stainless chilling coils are built in for maintaining temps.

After a 20 minute whirlpool of hops I started transferring the chilled wort (about 80F with ground water) into the conical.  The slow rate due to the warm ground water resulted in about a 20 minute chill time into the conical; that likely added a bit more IBUs since the hops were in-contact for a bit longer.  That’s OK, it was under 20 IBUs already.

I'm full.

Transferred all 16 gallons and aerated with Oxygen

16 Gallons in the conical now.  I applied oxygen for approximately 180 seconds (60s per 5 gallons) and pitched the yeast.  Closing the top and connecting the blow-off tube and it’s all done.

Bubbly

Blow-off arm attached and connected to bucket/airlock

The temp in the garage is going to hit mid-90s, but the yeast strain from Jester King is highly temperature tolerant and produces a super-dry and attenuated beer.  After it’s fermented to dryness, I’ll connect the glycol chiller and bring the temperature down to around 60F which will help the bacteria start to sour the beer a bit.  I’ll follow up with a post on connecting and using the chiller as well as a post on recirculating bottling sugar and yeast when I bottle the batch from the conical directly.

I’m superbly happy with the conical so far and I’ll be sure to share any issues I encounter along the way.

Here’s Hoshi no Ojisama scaled up to 16G, along with some hop-changes for using older hops I still have around.

Recipe Details

Batch Size Boil Time IBU SRM Est. OG Est. FG ABV
16 gal 60 min 23.3 IBUs 2.2 SRM 1.026 1.005 2.7 %
Actuals 1.025 0 0.0 %

Style Details

Name Cat. OG Range FG Range IBU SRM Carb ABV
Saison 17 2 1.048 - 1.065 1.002 - 1.012 20 - 35 5 - 14 2.2 - 2.8 5 - 7 %

Fermentables

Name Amount %
Pilsen (BestMälz) 13 lbs 81.25
Wheat (BestMälz) 3 lbs 18.75

Hops

Name Amount Time Use Form Alpha %
Target 2 oz 60 min Boil Pellet 4.3
Tettnang 2 oz 10 min Boil Pellet 2.3
Target 2 oz 20 min Aroma Pellet 4.3
Tettnang 2 oz 20 min Aroma Pellet 2.3
Galaxy 0.87 oz 20 min Aroma Pellet 8.3
Crystal 3 oz 7 days Dry Hop Pellet 0.9
Willamette 2.37 oz 7 days Dry Hop Pellet 1.7

Miscs

Name Amount Time Use Type
Phosphoric Acid 20.00 ml 60 min Mash Water Agent
Calcium Chloride 1.20 g 60 min Mash Water Agent
Epsom Salt (MgSO4) 1.20 g 60 min Mash Water Agent
Gypsum (Calcium Sulfate) 1.20 g 60 min Mash Water Agent

Yeast

Name Lab Attenuation Temperature
Jester King Mixed Culture (JK01) Jester King 84% 65°F - 77°F

Mash

Step Temperature Time
Saccharification 156°F 40 min
Mash Out 168°F 10 min

Notes

http://jesterkingbrewery.com/jester-king-homebrew-recipes-part-ii

Hop Change:
EKG -> Target
Fuggle -> Tett
Add Fruity hop (Galaxy or Moz) to hopstand

2016-07-25 - 9AM -> 1:45PM
Hydro was below 1.000, so estimating at 0.995; temp 175F ~ 1.022
O.G post-boil @ 17.33 gallons was 6.4 brix, which resulted in 1.025 S.G
Pitched 500mL of JK slurry from last Hoshi, aerated for 120 seconds with Oxygen
Temp reading at 86F in garage, likely to rise. No chilling attached.

Smoking malts for a Sour Smoky Stout

IMG_20151231_161800

I remember when I really fell in love with Jester King sours. Years ago I volunteered at Jester King with my good friend Mark on a bottling day. Turns out it was a Funk Metal day which is an amazing beer to bottle. Back then, the volunteers got to take some of the failed QC (almost always underfills or busted labels) bottles home. The other benefit was being able to drink Jester King beer on the job. It so happened that along with Black Metal Stout (non-farmhouse, aka OG BMS) and the ever present Le Petite Prince they had Salt Lick Saison, renamed Censored Saison due to the ridiculous laws here in Texas which don’t allow breweries to endorse a product by putting the name on the label. The massive level of smoke was initially too much but strong sour really wom me over; the combination was amazing. At the end of my shift I knew why Jester King prefers something light like Le Petite as I was feeling the 6% smoked saison.  Salt Lick Saison hasn’t been produced since that summer but the other smoked beers by Jester King, namely Gotslandricka, has similar levels of smokiness and a touch of sour.

My cellar is almost bare of these great smoked sours so I decided it was time to brew something of my own. Last summer Jester King brewed Black Metal Stout  for the first time in years and due to the time of the year, winter, the cold fermentation favored sour acid production resulting in an amazing combination of roast and sour. In this homebrew I’m hoping to clone that combination and add some smoke as well.

IMG_20151231_161749

This is my first experiment with smoking my own malt. Cursory reading of the homebrew forums indicated that a low temperature, about 100F,  is best, as is the use of some sprayed water to help the malt absorb the smoke. I didn’t make my own basket but I did find a sink colander which does the right thing for exposing the malt to the smoke. I smoked 15# of Maris Otter, roughly 50% of the base malt bill in the Black Metal Stout recipe for approximately 45 minutes with a combination of oak and mesquite smoke. Only time will tell if this was enough, or too much (ha!).

I’ll be sure to report back on how this one turned out.  Happy New Year!

Recipe Details

Batch Size Boil Time IBU SRM Est. OG Est. FG ABV
11 gal 60 min 31.3 IBUs 69.2 SRM 1.082 1.014 9.0 %
Actuals 1.082 1.014 9.0 %

Style Details

Name Cat. OG Range FG Range IBU SRM Carb ABV
Imperial Stout 13 F 1.075 - 1.115 1.018 - 1.03 50 - 90 30 - 40 1.8 - 2.6 8 - 12 %

Fermentables

Name Amount %
Maris Otter (Thomas Fawcett) 14.938 lbs 39.12
Smoked Pale Malt, Maris Otter (Thomas Fawcett) 14.938 lbs 39.12
Black Barley (Stout) 2.467 lbs 6.46
Black (Patent) Malt 1.599 lbs 4.19
Chocolate Malt (Thomas Fawcett) 1.599 lbs 4.19
Brown Malt 15.21 oz 2.49
Caramel/Crystal Malt - 40L 15.19 oz 2.49
Crystal Dark - 77L (Crisp) 12 oz 1.96

Hops

Name Amount Time Use Form Alpha %
Citra 1 oz 60 min Boil Pellet 14.4
Goldings, East Kent 2 oz 5 min Boil Pellet 5

Miscs

Name Amount Time Use Type
Calcium Chloride 5.00 g 60 min Mash Water Agent
Gypsum (Calcium Sulfate) 5.00 g 60 min Mash Water Agent
Epsom Salt (MgSO4) 1.20 g 60 min Mash Water Agent

Yeast

Name Lab Attenuation Temperature
JK01 (JK01) Jester King Brewery 86% 60°F - 90°F

Mash

Step Temperature Time
Saccharification 156°F 40 min
Mash Out 168°F 10 min

Notes

Kunsei (smoked) Makkuro-Kurosuke

Mosaic IPA v3

Mmm, Yellow Rose

Homebrew Mosaic IPA on the left, Yellow Rose on the right.

Brewing and IPA just the way you want has always proved to be more difficult that I’ve wanted.  The Mosaic IPA is no different.  I’ve had plenty of Lone Pint’s Yellow IPA to know what I really liked about it:  huge amazing Mosaic nose and aromatics, sweet, but light malt flavors, and a solid bitter and dry finish.

V1 was a small batch and didn’t quite attenuate exactly as intended, partly due to learning temps and mashing in the small batch setup but it was in the ballpark for what we wanted in a clone.

V2 was a scaled up to a 6 gallon batch.  When I brewed V2 I did have a slight shortage of Mosaic hops and had to go with a Mosaic/Simcoe blend.  In tasting, this had almost zero impact in aroma and flavor.  That wasn’t too surprising considering Mosaic’s heritage.   Color was spot on as well as clarity.  The real difference was in the taste.  In a side-by-side with a bottle of Yellow Rose, it was clear that my V2 was sweeter than YR; something I knew as I was sampling V2.  V2 finished around 1.016 or so which is much sweeter than my palate enjoys nowadays.  However, beyond the sweeter malt flavors it was lacking some of the hop bite.

The reviews of V2 were all similar: good, but not quite right, needs more hops.  Well, that’s not a problem.  So on to V3!  I wanted to achieve two things.  First, and foremost, the beer needed to finish drier than V2.  Considering the yeast I have, Dry English Ale, which already does a really solid 75 to 80% attenuation, I decided I’d employ some step mashing to maximize beta amylase hoping to reduce the final gravity.  The second goal was to bump up the bitter a bit as well, oh and this time use all Mosaic for sure.

The recipe below includes these changes.  Brewing of V3 was picture perfect.  However, somewhere along the mash, we accidentally bumped the efficiency from 72% to around 93%.  The pre-boil gravity target was to be 1.045 and we ended up with 1.055.  The final O.G ended at 1.083 instead of 1.067 meaning we had a 9% beer bordering on double IPA rather than a solid 6.5% IPA.  Worse things have happened.

Upon tasting V3 though it wasn’t significantly more bitter than V2 and it immediately dawned on me that the additional efficiency was the source of the trouble.  Since the boil gravity was much higher than expected, that resulted in a lower alpha-acid isomerization, and lower IBUs in the final product.  I should have adjusted the amount of hops in the boil to combat the higher gravity wort.  Clearly a V4 will be needed.

V3 finished at 1.016, but considering the starting gravity I don’t think I can expect WLP 007 and mash techniques to get any lower.  80% attenuation is the top end for this ale strain.  But I know some other strains that can go a bit higher.  For V4, I’ll brew another 6 gallons of wort but this time pitch my favorite strain, the Jester King mixed culture.

The Jester King blend attenuates just about anything down to 1.000 SG.  Jester King already produces a number of highly hopped beers, namely Wytchmaker Rye IPA and El Cedro, Cedar IPA.  I’m also interested in their collaborations with many breweries in which they use wort produced by their partners and then pitch the mixed culture and see what sort of beer it becomes.

V4 will use the same recipe as V3, but will use the JK mixed culture instead. Fermentation temperature will change as well, the JK blend tends to produce a more sour wort at cooler temperatures, so a minimum temp of about 75F or higher will be used to encourage the yeast to dominate and keep the bacteria in check (at least for a while).  As a bonus, cold conditioning in bottle will keep hop aroma as the brett is an oxygen consumer and the bacteria like to produce some lactic acid!  Who doesn’t want a hoppy sour beer? =)

Recipe Details

Batch Size Boil Time IBU SRM Est. OG Est. FG ABV
6 gal 90 min 81.0 IBUs 4.1 SRM 1.066 1.015 6.7 %
Actuals 0 1.01 -75.8 %

Style Details

Name Cat. OG Range FG Range IBU SRM Carb ABV
American IPA 14 B 1.056 - 1.075 1.01 - 1.018 40 - 70 6 - 15 2.2 - 2.7 5.5 - 7.5 %

Fermentables

Name Amount %
Pilsen (BestMälz) 14.764 lbs 100

Hops

Name Amount Time Use Form Alpha %
Mosaic 0.99 oz 90 min Boil Pellet 11.6
Mosaic 1.62 oz 10 min Boil Pellet 11.6
Mosaic 1.62 oz 20 min Aroma Pellet 11.6
Mosaic 3.17 oz 5 days Dry Hop Pellet 11.6

Miscs

Name Amount Time Use Type
Gypsum (Calcium Sulfate) 4.60 g 60 min Mash Water Agent
Calcium Chloride 2.70 g 60 min Mash Water Agent
Epsom Salt (MgSO4) 1.90 g 60 min Mash Water Agent
Whirlfloc Tablet 1.00 Items 15 min Boil Fining

Yeast

Name Lab Attenuation Temperature
Dry English Ale (WLP007) White Labs 75% 65°F - 70°F

Mash

Step Temperature Time
Beta Rest 140°F 45 min
Saccharification 152°F 20 min
Mash Out 168°F 10 min

Notes

Beta Focus for dryer beer:
Mash in 140F, hold 40 mins
Raise to 152, hold for 20 mins