Brewmaster bucket challenges

Almost looks too good to be true.  However, as most NEIPA brewers know: oxygen is the enemy.  My previous batch turned out quite excellent, and held it’s straw yellow color until the keg floated (just yesterday actually).  This batch tested out a different grain bill, moar hops, of course, and replacing the Huell Melon hop (which is very melon focused, no doubt) with some flavors I prefer:  Mosaic, Meridian, Amarillo, Azacca.  I wanted a more citrus focus.

This was my second batch in the brewmaster bucket with FTSS2 connected to the glycol chiller.  The fermentation process went just fine as with the first batch.  I’d pull a sample every day for the first seven days.  I was a bit paranoid that the previous batch had some bit of diacetyl because I kegged the thing after 6 days.  This batch I was determined to avoid this and employed the forced diacetyl tests and held the beer at 71F until I was certain there was nothing left.  After crashing, I dry-hopped the batch with another 4 ounces of hops and things were tasking _amazing_.   Then came transfer day.

Yeah.  I could not get any flow out of this bucket.  You can’t pressurize it.  That is possible with modifications and replacing the lid but that isn’t easy when using the FTSS coils, and even if I switched it would expose the beer to tons of O2!  I worked the the sample value until it started leaking and was about to come out.  With nothing left to help the transfer all I had left was to _pour_ the beer from the bucket into the keg.

The bucket definitely could not handle that amount of hops and yeast.  And rotating the sample value wasn’t helpful as it became loose.  And I had to guess if I had the tube facing upward or down.  No fun at all.   The beer in the end came out alright but the color is full of oxygen now and it’ll drink OK but won’t last.  I’ve already found a replacement for this bucket and looking forward to the first beer out of it. For now, here’s the recipe. I’ll need to repeat this on the new equipment to compare.

Recipe Details

Batch Size Boil Time IBU SRM Est. OG Est. FG ABV
6 gal 60 min 69.4 IBUs 6.0 SRM 1.064 1.019 6.0 %
Actuals 1.064 1.017 6.2 %

Style Details

Name Cat. OG Range FG Range IBU SRM Carb ABV
American IPA 13 2 1.056 - 1.075 1.01 - 1.018 40 - 70 6 - 15 2 - 2.8 5.5 - 7.5 %

Fermentables

Name Amount %
Brewers Malt 2-Row (Briess) 6.5 lbs 44.07
Golden Promise (Simpsons) 5 lbs 33.9
Carafoam 1.5 lbs 10.17
Aromatic Malt (Briess) 1 lbs 6.78
Acidulated (BestMälz) 8 oz 3.39
Dextrose (Briess) 4 oz 1.69

Hops

Name Amount Time Use Form Alpha %
Columbus/Tomahawk/Zeus (CTZ) 0.35 oz 30 min Boil Pellet 15.5
Apollo 1 oz 20 min Aroma Pellet 18
Azacca 1 oz 20 min Aroma Pellet 15
Citra 1 oz 20 min Aroma Pellet 14.4
Idaho #7 1 oz 20 min Aroma Pellet 13
Citra 1 oz 14 days Dry Hop Pellet 12
Idaho #7 1 oz 14 days Dry Hop Pellet 13
Meridian 2 oz 7 days Dry Hop Pellet 6.5
Mosaic 2 oz 7 days Dry Hop Pellet 11.6

Miscs

Name Amount Time Use Type
Calcium Chloride 5.28 g 60 min Mash Water Agent
Gypsum (Calcium Sulfate) 2.64 g 60 min Mash Water Agent
Phosphoric Acid 1.20 ml 60 min Mash Water Agent

Yeast

Name Lab Attenuation Temperature
German Ale/Kolsch (WLP029) White Labs 75% 65°F - 69°F

Mash

Step Temperature Time
Saccharification 158°F 35 min
Mash Out 168°F 15 min

Notes

Calcium Cloride @ 1g / Gal. , Gypsum @ 0.5g / Gal

Houston, we have Haze

#NotHoustonHaze #IBrewedThat

Two-story Nor’Easter IPA — looking quite hazy!

Has it really been almost six months since the last brew? Yes. Yes it has. It turns out that life, including moving your house does happen to take up precious brewing time. We moved, not far, in April and it was a crazy time with getting the old house in order, buying a new house, selling the old and figuring out what to do with all of the things… (#kondotime).

#leverage

New garage/brewery layout. I used some of the shelves from the shed and I’m looking forward to using hooks and a pulley to add/remove kegs from keezer.

It does bring a small tear to my eye that I no longer have a BattleShed, as it was affectionately called for some time. Good friends of mine worked many hours to help insulate and prepare the shed to perform as a beer cellar. There were many ups and downs with the shed. I won’t forget the first time I tried to roll at 15 Gallon barrel up into the shed; I eventually got it in there. I also remember walking out in the morning and hearing the AC unit “announce” that it had frozen the coils again. After nearly 4 years of shed-life, one thorough cleaning of the AC unit to restore full functionality and a quarter of the floor being destroyed due to water leakage from a said AC unit it was time to say goodbye.

#leakfree

Brewbucket water leak test. Definitely needed. Had to swap where o-rings were and check fittings.

With the shed gone and new new replacement it did mean some hard decisions on future brewing. Upgrading to the half-barrel Chronical was a massive improvement in beer quality (not to mention quantity). However, during experimentation phase, it did punish the budget (NEIPAs are super pricey when making 15 gallon batches), and mean that even successful batches didn’t get completely consumed soon enough to avoid going bad. So, I’m transitioning back to five or six gallon batches. I picked up a SS Brewtech Brewbucket with the cooling attachments which work perfectly with the existing glycol chiller loop I have. And later this summer I’ll also switch to electric brewing; looking forward to the easier mash temp control. More on that later.

#ElectricBrewer #WhenWillThenBeNow #Soon

Brewstand still holding up. Put the 30G up for the HLT and moved the 20G back to boil kettle.

What to brew for a first batch then? I had stepped away from NEIPAs while I worked out more details on recipes, techniques, malt bills, pH, hop creep, yeast strains; the whole nine yards. I’m a huge fan of Scott Janish’s blog which explored so many aspects of NEIPAs that I found to be critical to producing a really excellent beer of the style. The recent recipe from Scott caught my eye and I decided to start there. The other area of interest that I’ve been chasing down was a local brew pub (Pint House Pizza) which makes some really top-notch NEIPAs in our area has mentioned in several interviews that their house strain is not as affected by diacetyl and hop-creep as other well known strains. Joe Morhfield of PHP is very open about recipes and providing feedback to homebrewers; but on this point they keep their house strain to themselves. I don’t know definitively but I’m making an educated guess and for this batch I picked up White Labs German Ale yeast (WLP 029). I’ve seen several threads about a “fruity” ale yeast which finishes fairly dry.

Let’s see how this one comes out.  The recipe follows after some brewday pics!

Enjoy!

#granola

Milky Oatmeal with that Flaked Barley

#Heady

Where was my larger nylon bag? #IHateMoving

#swatter

Fly sparge!

#NoFilter

Transfers are really simple with gravity and no poppet valves.

#SmellTheHops

Co2 Blanket added to source and destination

Recipe Details

Batch Size Boil Time IBU SRM Est. OG Est. FG ABV
6 gal 60 min 62.8 IBUs 4.0 SRM 1.061 1.018 5.6 %
Actuals 1.05 1.012 5.0 %

Style Details

Name Cat. OG Range FG Range IBU SRM Carb ABV
American IPA 13 2 1.056 - 1.075 1.01 - 1.018 40 - 70 6 - 15 2 - 2.8 5.5 - 7.5 %

Fermentables

Name Amount %
Brewers Malt 2-Row (Briess) 7 lbs 51.85
Barley, Flaked 3 lbs 22.22
Wheat - Red Malt (Briess) 3 lbs 22.22
Acidulated (BestMälz) 8 oz 3.7

Hops

Name Amount Time Use Form Alpha %
Columbus (Tomahawk) 0.35 oz 30 min Boil Pellet 14
Cascade 1.98 oz 30 min Aroma Pellet 5.5
Citra 1.98 oz 15 min Aroma Pellet 12
Columbus (Tomahawk) 1.76 oz 15 min Aroma Pellet 14
Citra 0.99 oz 14 days Dry Hop Pellet 12
Galaxy 0.99 oz 14 days Dry Hop Pellet 14
Huell Melon 1.98 oz 2 days Dry Hop Pellet 7.2

Miscs

Name Amount Time Use Type
Calcium Chloride 5.60 g 60 min Mash Water Agent
Gypsum (Calcium Sulfate) 2.40 g 60 min Mash Water Agent
Lactic Acid 1.20 ml 60 min Mash Water Agent

Yeast

Name Lab Attenuation Temperature
German Ale/Kolsch (WLP029) White Labs 75% 65°F - 69°F

Mash

Step Temperature Time
Saccharification 157°F 35 min
Mash Out 168°F 15 min

Notes

Calcium Cloride @ 1g / Gal. , Gypsum @ 0.5g / Gal
Huell Melon @ 2nd day
All the rest @ 7th day
https://scottjanish.com/headspace-hazy-ipa-oxidation/


Mash pH was a bit lower than anticipated, resulting in 10 point
gravity loss. Partly due to adding 2.5mL of Phosphoric Acid
rather than the 1.2mL as listed. However, the resulting beer is
quite excellent so not a terrible issue. Maybe lowering efficiency
numbers and adding a pound or two of malt to adjust.

Hop combo isn't my favorite; I like a bit more grapefruit. Next time
I'd toss Azacca and some El Dorado or Eukonaut in place of H. Melon.
Would also entertain some Simcoe for an orange direction as well.
Galaxy was sorely missed but out of stock.

Dialing in my NEIPA hop process

I’ve about four of these under my belt and I’ve had mixed results.  My first attempt was really a huge hit.  My take was that it tended to be a little sweet for my tastes but was a crowd pleaser.  The recipe was a bit heavy on the malt with a 50/50 2-row/Marris mix, and Honey malt.  My efficiency was a bit high too so ended up north of seven percent ABV which isn’t bad, lots of NEIPAs are in that area; but I was hoping for something around six percent instead.

The second iteration modified the grain bill to match my Session IPA recipe but with modified hoping times and quantities to match the NEIPA style and I also tested out using a mixed-culture strain.  When young, this one turned out very well but was a bit extreme with the grapefruit hop; so not as juicy as I would have liked.  The Belgian phenols weren’t overly distracting but I prefer my NEIPAs with a clean yeast profile.

The third recipe resulted in even greater amount of hop bitterness; the exact opposite of what one wants with a NEIPA.  And at this point I started looking at what might have gone wrong.

  1. Don’t use Cyrohops like regular hops where you might get IBUs.
  2. Ensure whirlpool temp is below 180F
  3. The sweet-spot for whirlpool flavor and aroma is around 10 minutes
  4. Stirring the whirlpool provides extra extraction (and bitterness)
  5. Larger boil volumes have increased utilization

My first batch used zero Cryohops.  I ended up getting some for my second batch, but I used them in the whirlpool/hopstand which greatly enhanced the aroma and flavors but I’m positive due to the high temp (flameout, no chilling) it certainly extracted alpha acids and more than I anticipated due to a long 30 minute hold.  This embodies issues 1 through 4.   The last issue I only recently read about as I was searching for why some of my lighter styles, witbier and pilsner seem to have been over the threshold that I would like in the particular style.  It’s not entirely clear if there I’m actually seeing increased utilization in a 20 gallon boil for a 15 to 16 gallon batch, but I’m sure that in both of those recipes, version two will reduce the amount of hops I use but at least 10% if not 20.

Thus, today I brewed a batch hoping to remedy all of these issues.  Aptly named, Not Grapefruit Juice; which ultimately remains to be seen.  The grain bill adds back in some of the Honey malt, it provides a nice background sweetness independent of the finishing gravity and doesn’t taste to my palette cloying.  I’ve settled on roughly 50/50 flaked oats and white-wheat; the wheat gives a nice subtle toast and a touch of acidity to the base wort.  Finally, I’ve added some Carapils for head retention.  My previous batch attempted to address concerns over head retention through the elimination of use of Anti-Foamer, both in the starters and in the boil.  The result showed no difference in additional head retention over other batches I’ve had.   I’m super happy about that because taming both the 5L starter on the stove and the 20 gallon batch in the garage was intense.  A couple drops of defoamer in the wort and I’m totally relaxed.

I ended up with a 90 minute boil as the evaporation rate today was just super low.  A 5 minute edition and then flameout, chill to 175F before adding in the whirlpool hops, 10 minutes, then pump into the conical.  The taste of the wort going into the fermentation chamber was nice, hoppy but super mellow; almost no bitterness.  \o/

Recipe Details

Batch Size Boil Time IBU SRM Est. OG Est. FG ABV
16 gal 60 min 69.2 IBUs 4.6 SRM 1.063 1.012 6.7 %
Actuals 1.058 1.007 6.7 %

Style Details

Name Cat. OG Range FG Range IBU SRM Carb ABV
American IPA 13 2 1.056 - 1.075 1.01 - 1.018 40 - 70 6 - 15 2 - 2.8 5.5 - 7.5 %

Fermentables

Name Amount %
Brewers Malt 2-Row (Briess) 23 lbs 64.79
Oats, Flaked 6 lbs 16.9
White Wheat Malt 5 lbs 14.08
Honey Malt 1 lbs 2.82
Carapils (Briess) 8 oz 1.41

Hops

Name Amount Time Use Form Alpha %
Columbus (Tomahawk) 1 oz 60 min First Wort Pellet 15.3
Citra 2 oz 5 min Boil Pellet 14.4
Galaxy 2 oz 5 min Boil Pellet 14.8
Mosaic (HBC 369) 2 oz 5 min Boil Pellet 12.3
Citra 2 oz 10 min Aroma Pellet 14.4
Galaxy 2 oz 10 min Aroma Pellet 14.8
Mosaic 2 oz 10 min Aroma Pellet 11.6
Citra 3 oz 8 days Dry Hop Pellet 14.4
Mosaic 3 oz 8 days Dry Hop Pellet 11.6
Citra 3 oz 4 days Dry Hop Pellet 14.4
Mosaic 3 oz 4 days Dry Hop Pellet 11.6

Miscs

Name Amount Time Use Type
Calcium Chloride 8.50 g 60 min Mash Water Agent
Epsom Salt (MgSO4) 2.30 g 60 min Mash Water Agent
Gypsum (Calcium Sulfate) 2.20 g 60 min Mash Water Agent
Phosphoric Acid 20% 1.10 ml 60 min Mash Water Agent

Yeast

Name Lab Attenuation Temperature
San Diego Super Yeast (WLP090) White Labs 80% 65°F - 68°F

Mash

Step Temperature Time
Saccharification 152°F 60 min
Mash Out 168°F 10 min

Notes

Boiloff was really low, like 10% instead of 18,
Added 30 minutes to boil. Had extra gallon of wort.

WLP090 Recommendations:
"Make sure you make a proper sized starter, pitch cool at 65˚F then set your
regulator to 66˚F, let it rock for 3 days, then raise the temp to 70˚F for a
couple days to encourage complete attenuation and reabsorption of
fermentation byproducts. At this point, I usually crash the beer to 32˚F for
a couple days then keg per my typical method, pouring the first pint a
couple days later."
-- http://brulosophy.com/2014/10/06/is-san-diego-really-all-that-super-a-yeast-comparison/

Mosaic IPA v3

Mmm, Yellow Rose

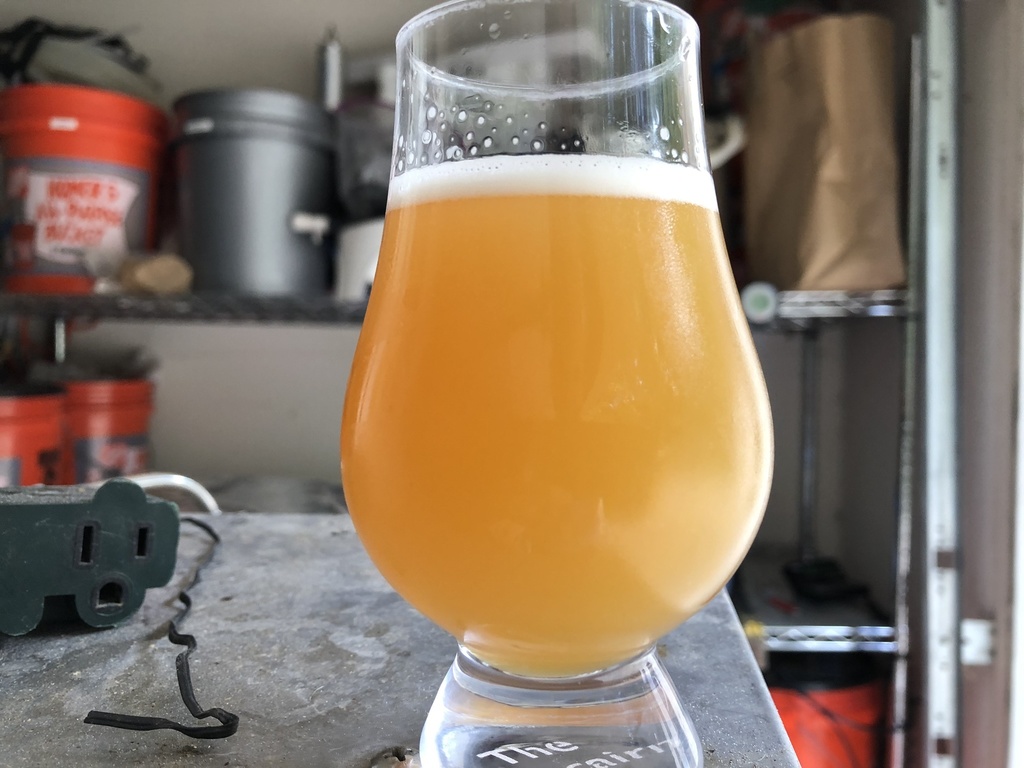
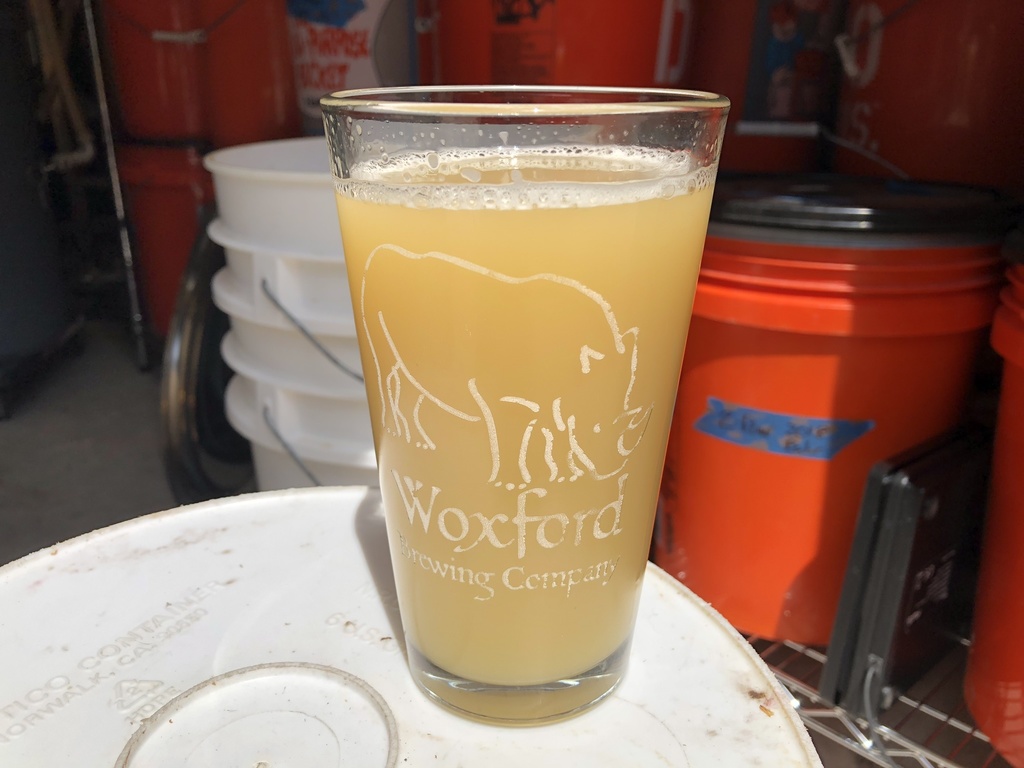
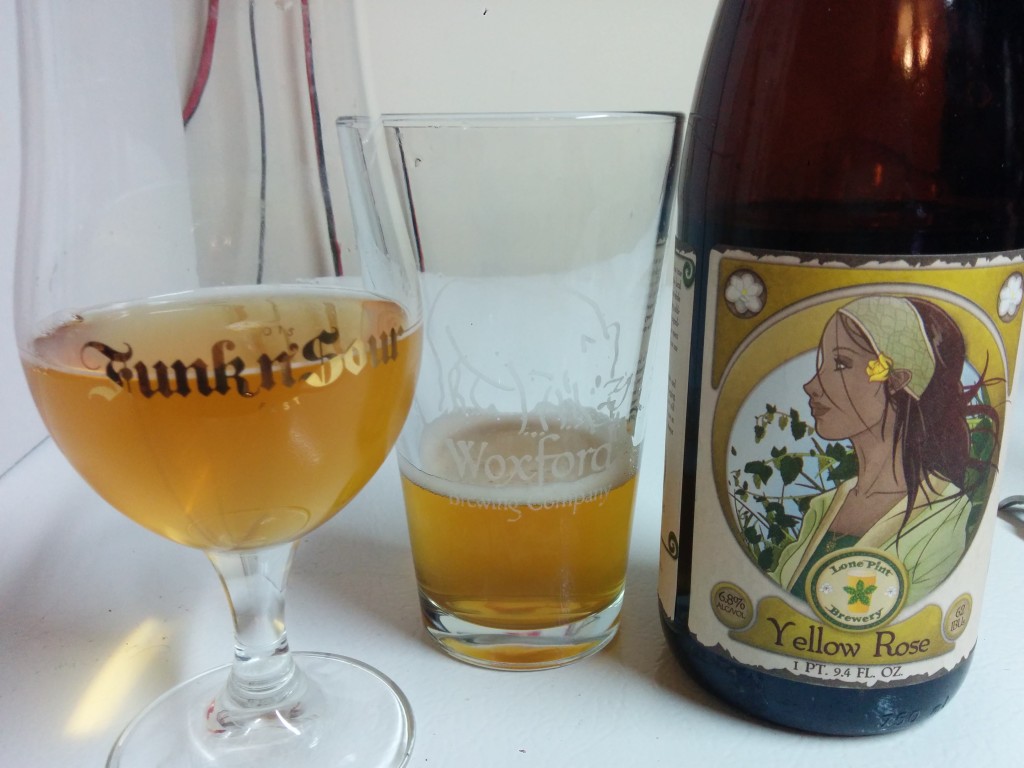
Homebrew Mosaic IPA on the left, Yellow Rose on the right.

Brewing and IPA just the way you want has always proved to be more difficult that I’ve wanted.  The Mosaic IPA is no different.  I’ve had plenty of Lone Pint’s Yellow IPA to know what I really liked about it:  huge amazing Mosaic nose and aromatics, sweet, but light malt flavors, and a solid bitter and dry finish.

V1 was a small batch and didn’t quite attenuate exactly as intended, partly due to learning temps and mashing in the small batch setup but it was in the ballpark for what we wanted in a clone.

V2 was a scaled up to a 6 gallon batch.  When I brewed V2 I did have a slight shortage of Mosaic hops and had to go with a Mosaic/Simcoe blend.  In tasting, this had almost zero impact in aroma and flavor.  That wasn’t too surprising considering Mosaic’s heritage.   Color was spot on as well as clarity.  The real difference was in the taste.  In a side-by-side with a bottle of Yellow Rose, it was clear that my V2 was sweeter than YR; something I knew as I was sampling V2.  V2 finished around 1.016 or so which is much sweeter than my palate enjoys nowadays.  However, beyond the sweeter malt flavors it was lacking some of the hop bite.

The reviews of V2 were all similar: good, but not quite right, needs more hops.  Well, that’s not a problem.  So on to V3!  I wanted to achieve two things.  First, and foremost, the beer needed to finish drier than V2.  Considering the yeast I have, Dry English Ale, which already does a really solid 75 to 80% attenuation, I decided I’d employ some step mashing to maximize beta amylase hoping to reduce the final gravity.  The second goal was to bump up the bitter a bit as well, oh and this time use all Mosaic for sure.

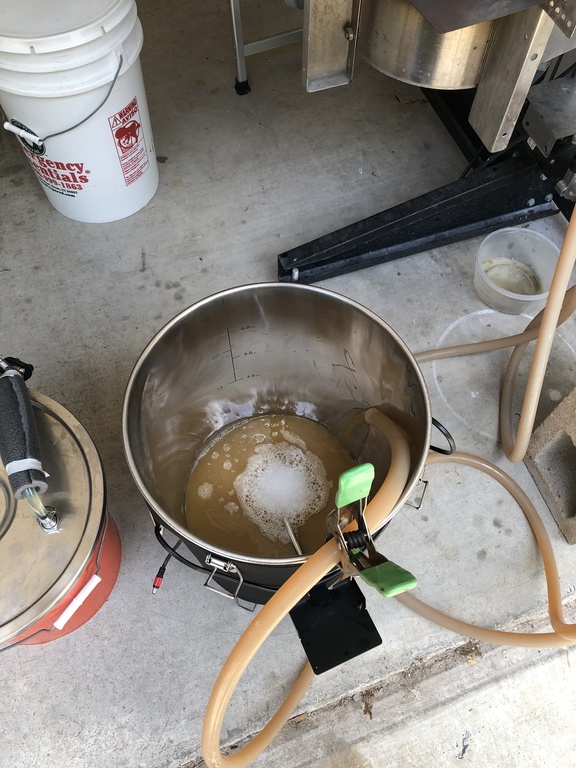
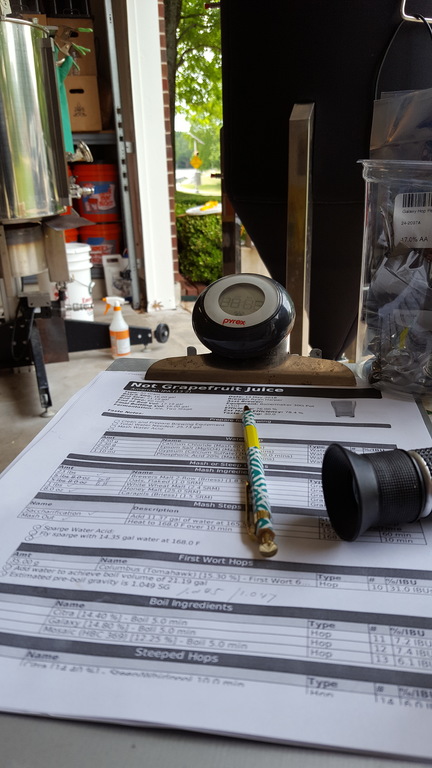
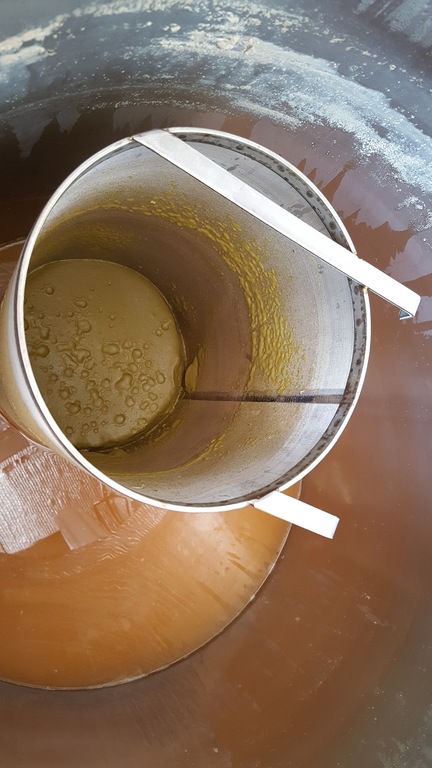
The recipe below includes these changes.  Brewing of V3 was picture perfect.  However, somewhere along the mash, we accidentally bumped the efficiency from 72% to around 93%.  The pre-boil gravity target was to be 1.045 and we ended up with 1.055.  The final O.G ended at 1.083 instead of 1.067 meaning we had a 9% beer bordering on double IPA rather than a solid 6.5% IPA.  Worse things have happened.

Upon tasting V3 though it wasn’t significantly more bitter than V2 and it immediately dawned on me that the additional efficiency was the source of the trouble.  Since the boil gravity was much higher than expected, that resulted in a lower alpha-acid isomerization, and lower IBUs in the final product.  I should have adjusted the amount of hops in the boil to combat the higher gravity wort.  Clearly a V4 will be needed.

V3 finished at 1.016, but considering the starting gravity I don’t think I can expect WLP 007 and mash techniques to get any lower.  80% attenuation is the top end for this ale strain.  But I know some other strains that can go a bit higher.  For V4, I’ll brew another 6 gallons of wort but this time pitch my favorite strain, the Jester King mixed culture.

The Jester King blend attenuates just about anything down to 1.000 SG.  Jester King already produces a number of highly hopped beers, namely Wytchmaker Rye IPA and El Cedro, Cedar IPA.  I’m also interested in their collaborations with many breweries in which they use wort produced by their partners and then pitch the mixed culture and see what sort of beer it becomes.

V4 will use the same recipe as V3, but will use the JK mixed culture instead. Fermentation temperature will change as well, the JK blend tends to produce a more sour wort at cooler temperatures, so a minimum temp of about 75F or higher will be used to encourage the yeast to dominate and keep the bacteria in check (at least for a while).  As a bonus, cold conditioning in bottle will keep hop aroma as the brett is an oxygen consumer and the bacteria like to produce some lactic acid!  Who doesn’t want a hoppy sour beer? =)

Recipe Details

Batch Size Boil Time IBU SRM Est. OG Est. FG ABV
6 gal 90 min 81.0 IBUs 4.1 SRM 1.066 1.015 6.7 %
Actuals 0 1.01 -75.8 %

Style Details

Name Cat. OG Range FG Range IBU SRM Carb ABV
American IPA 14 B 1.056 - 1.075 1.01 - 1.018 40 - 70 6 - 15 2.2 - 2.7 5.5 - 7.5 %

Fermentables

Name Amount %
Pilsen (BestMälz) 14.764 lbs 100

Hops

Name Amount Time Use Form Alpha %
Mosaic 0.99 oz 90 min Boil Pellet 11.6
Mosaic 1.62 oz 10 min Boil Pellet 11.6
Mosaic 1.62 oz 20 min Aroma Pellet 11.6
Mosaic 3.17 oz 5 days Dry Hop Pellet 11.6

Miscs

Name Amount Time Use Type
Gypsum (Calcium Sulfate) 4.60 g 60 min Mash Water Agent
Calcium Chloride 2.70 g 60 min Mash Water Agent
Epsom Salt (MgSO4) 1.90 g 60 min Mash Water Agent
Whirlfloc Tablet 1.00 Items 15 min Boil Fining

Yeast

Name Lab Attenuation Temperature
Dry English Ale (WLP007) White Labs 75% 65°F - 70°F

Mash

Step Temperature Time
Beta Rest 140°F 45 min
Saccharification 152°F 20 min
Mash Out 168°F 10 min

Notes

Beta Focus for dryer beer:
Mash in 140F, hold 40 mins
Raise to 152, hold for 20 mins

Mosaic IPA v2

60 sq.ft of Bottle Aging

The Battle Shed is now equipped with a bottle shelf for aging

Earlier this year I took a swing at brewing a SMaSH Mosaic IPA as a small batch.  I was still learning the details of the stove-top setup so hitting the numbers was challenging.  I ended up a bit short on gravity, and found out that Safale S-04 is NOT a replacement for White Labs Dry English Ale (WLP007) in any way shape or form.

The result of the brew was a medium strength IPA with a great nose and solid taste, if a bit sweet in the finish.  It was received well enough that it’s been requested again, but in a much bigger batch.  I won’t tweak all that much, except the mash profile to ensure a really dry finish since the Pilsner malt lends a significant amount of sweetness, despite not having any Crystal in the grain bill.

https://utahbiodieselsupply.com/brewingfilters.php

8″ x 10″ Hop Spider from Utah Biodiesel

I’ll also get a chance to use a few of the newer stainless hop screens.  I picked up a hop basket to replace my DIY hop spider.  It’s been an excellent upgrade simplifying the setup and cleanup.  I’ll also use the dry-hop tubes  and finally a two-stage filter to enhance the hop nose all the while staying O2 free.

How can I get all of those awesome beer stickers off ?

The Leaky Fermentor fermented its last beer. =(

Finally, my previous fermentation chamber The Smelly Beast,  A.K.A the Leaky Dripper , A.K.A The Garage Heater, A.K.A The Best Deal on Craigslist,  A.K.A 25 Dollars worth of Fridge has died.  Over the summer it increasingly would not keep anything under 50 degrees.  While that was fine for fermenting, it was NOT fine for hop storage in the freezer compartment.  Also, the constant drip of liquid was not much fun either.   Luckily Woxford has recently completed a 8′ x 10′ temperature controlled Battle Shed whose ambient temp is around 55F.  This Mosaic IPA will be the first clean beer to ferment in the shed with a heat belt to drive the temperature profile needed for a nice dry IPA.

Looking forward to getting another nice clean IPA through the system.  Hope you enjoy Mosaic IPA V2!

Recipe Details

Batch Size Boil Time IBU SRM Est. OG Est. FG ABV
6 gal 90 min 66.9 IBUs 4.1 SRM 1.062 1.011 6.7 %
Actuals 1.046 1.01 4.7 %

Style Details

Name Cat. OG Range FG Range IBU SRM Carb ABV
American IPA 14 B 1.056 - 1.075 1.01 - 1.018 40 - 70 6 - 15 2.2 - 2.7 5.5 - 7.5 %

Fermentables

Name Amount %
Pilsen (BestMälz) 14.764 lbs 100

Hops

Name Amount Time Use Form Alpha %
Mosaic 0.44 oz 90 min First Wort Pellet 11.6
Mosaic 2.22 oz 5 min Boil Pellet 11.6
Mosaic 2.22 oz 20 min Aroma Pellet 11.6
Mosaic 3.17 oz 5 days Dry Hop Pellet 11.6

Miscs

Name Amount Time Use Type
Phosphoric 58.80 ml 60 min Mash Water Agent
Gypsum (Calcium Sulfate) 12.60 g 60 min Mash Water Agent
Calcium Chloride 1.80 g 60 min Mash Water Agent
Epsom Salt (MgSO4) 1.20 g 60 min Mash Water Agent

Yeast

Name Lab Attenuation Temperature
Dry English Ale (WLP007) White Labs 75% 65°F - 70°F

Mash

Step Temperature Time
Protein Rest 131°F 15 min
Saccharification 148°F 45 min
Mash Out 168°F 10 min